TailwindCSS 1 Basic
playground
아래 사이트에서 연습이 가능하다.
📌 CSS 작성 규칙
작성 순서
- 외부 레이아웃에서 내부 박스로 스타일을 결정해나간다.
1.외부 레이아웃
- 1.레이아웃 : grid, flex, relative, absolute
- 2.박스모델 만들기 : w,h,p,m
2.내부 레이아웃
- 1.내부 레이아웃 : flex
- 2.박스 모델 스타일 : bg, border, rounded
3.콘텐츠 스타일링
- 1.콘텐츠 스타일 : text-color, text-size, font-bold, cursor
- 2.가상 클래스, 트랜지션, 애니메이션 : hover, transition, :disabled
단위체계
tailwind css 에서는 rem 단위를 사용한다.
- 1은 0.25 rem, 4는 1rem 이다.
- 디폴트 값으로 1rem은 16px이다.
- 고정된 px단위도 사용 가능하다.
# gap-1 은 0.25rem 만큼 떨어진다.
# px단위는 []을 이용해 사용한다.
<div class="flex flex-row gap-1 gap-[5px]">
  <div>1</div>
  <div>2</div>
  <div>3</div>
</div>
1.외부 레이아웃
1.1 flex, flex-col, justify, items, gap
# display:flex
className="flex"

# justify-content(main-axis)
className="flex justify-between"

# align-items(cross-axis)
className="flex items-center"

# direction
className="flex flex-row"
className="flex flex-col"

# gap
className="flex flex-col gap-y-4"

# flex:1 1 0%
className="flex flex-1"

# eg)
<div class="flex flex-row items-center justify-between gap-[5px]">
  <div>1</div>
  <div>2</div>
  <div>3</div>
</div>
1.2 w, h, p, m
# extrinsic
className="h-auto h-5 h-[40px]"
# intrinsic - 내부 요소에 의해 크기 결정
className="h-fit h-min h-max"
className="w-auto w-full w-5 w-[40px]"
className="p-8 p-[40px] px-8 py-8"
className="m-8 m-[40px] mx-8 my-8"
position, absolute
// 중앙 정렬을 수행 한다.
<div
  className="absolute
  right-[0px] top-[50%] transform -translate-x-1/2 -translate-y-1/2"
>
  <PiWarningCircleLight color="#EE4700" size={16} />
</div>
2.내부 레이아웃
2.2 bg, border, border-color, rounded
className="bg-red-200"
className="bg-red-200 bg-opacity-50"
className="border border-solid border-red-300"
className="border-2 border-red-300"
className="rounded-full"
className="border border-transparent rounded-full"
className="cursor-pointer rounded-full hover:opacity-75 transition"

eg)
<div class="h-40 w-40 cursor-pointer rounded-full border border-transparent bg-red-200 transition-colors hover:bg-red-300"></div>
overflow
# 평소에는 스크롤이 없다가, 오버플로 발생시 스크롤이 나온다.
className="overflow-y-auto"
bg-gradient-to-t from-black
className="w-full h-full absolute top-0 bg-gradient-to-t from-black"
backdrop-filter
# backdrop-filter: blur(10px);
# position: absolute; inset: 10px 20px 30px 40px;
className="bg-neutral-900/90 backdrop-blur-sm fixed inset-0"
콘텐츠 스타일링
3.1 text-color, text-size, font-bold, cursor
https://tailwindcss.com/docs/font-size
# color
className="text-green-500"

# font-size (text-sm, text-md, text-lg..)
className="text-sm text-md text-2xl text-[50px]"

# weight, font-bold(700)
className="font-medium font-[500] font-bold font-[700]"

className="cursor-pointer"
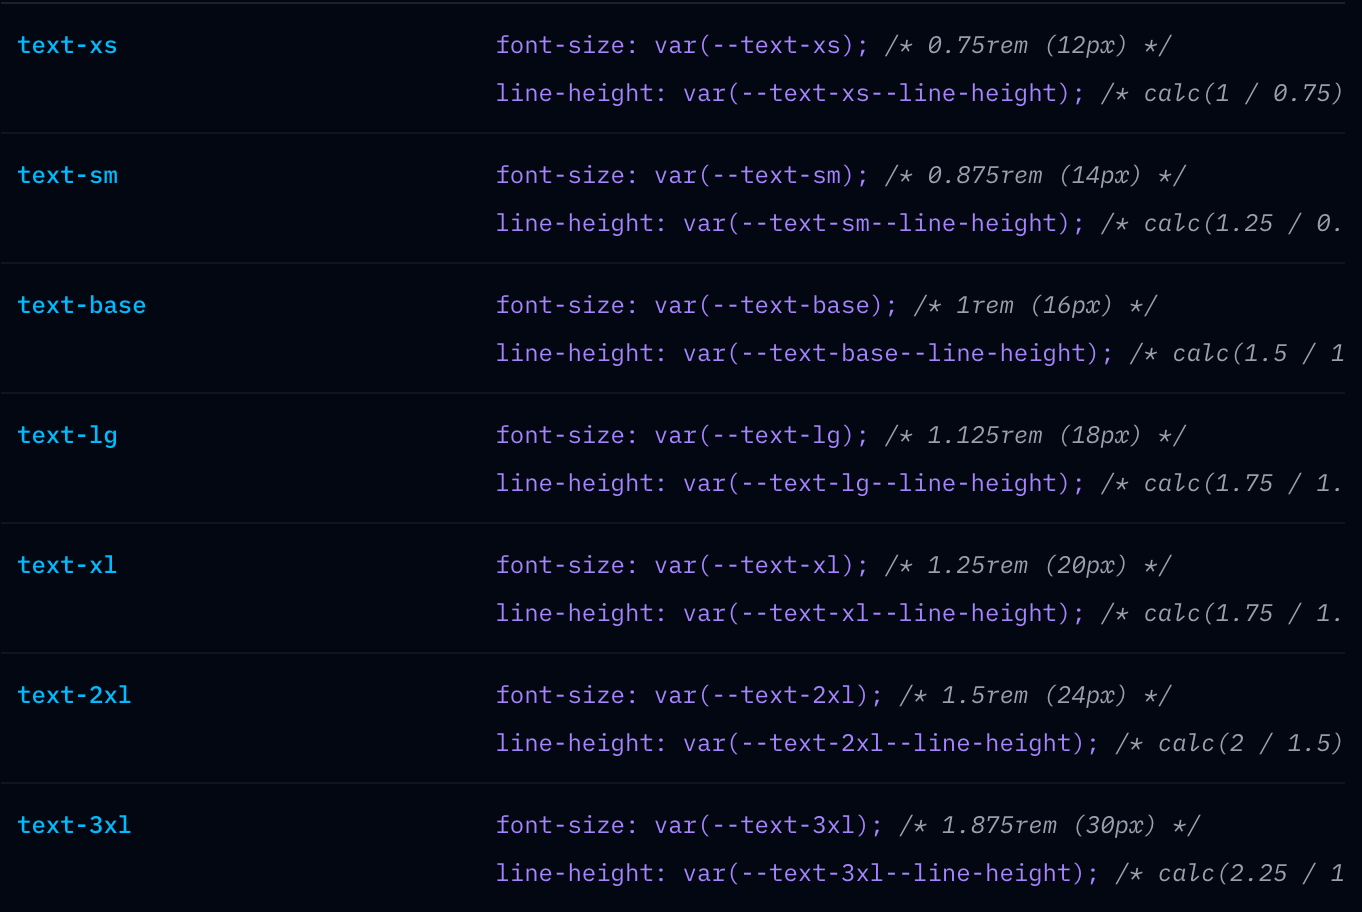
- xs(12), sm(14), base(16), lg(18), xl(20), 2xl(24), 3xl(30), 4xl(36)
3.2 hover, transition, :disabled
className="transition"
className="hover:text-white"
className="disabled:cursor-not-allowed disabled:opacity-50"
transform, translate
// 중앙 정렬을 수행 한다.
<div
  className="absolute
  right-[0px] top-[50%] transform -translate-x-1/2 -translate-y-1/2"
>
  <PiWarningCircleLight color="#EE4700" size={16} />
</div>
group
- group 이라는 classname
- 부모 선택자 (group), 부모 요소에 hover할 떄 자식요소들이 반응할 수 있다.
https://tailwindcss.com/docs/hover-focus-and-other-states#styling-based-on-parent-state
text underline
<Link
  className="underline underline-offset-4"
  href="https://github.com/vercel/ai-chatbot"
  target="_blank">
open source</Link>
text truncate
    <Link
      href={href}
      className={twMerge(
        `flex flex-row items-center gap-x-4
      h-auto w-full py-1
      text-md text-neutral-400 font-medium cursor-pointer
      hover:text-white transition`,
        active && "text-white"
      )}
    >
      <Icon size={26} />
      <p className="w-100 truncate">{label}</p>
    </Link>
etc
twMerge
React, NextJS에서 사용한다.
- 조건에 따라 선택적으로 className을 넣을 수 있다.
import { twMerge } from "tailwind-merge";
className={twMerge(``,active && "text-white")}
tailwindcss - nested group, data attribute variants
'use client';
import { motion } from 'framer-motion';
import cx from 'classnames';
import { SparklesIcon } from 'lucide-react';

// 1.재사용 가능한 컴포넌트의 group은 nested group 을 사용한다.
// - group에 별칭을 달아주는 느낌, ( group/message,group-hover/message:bg-muted )
// - https://tailwindcss.com/blog/tailwindcss-v3-2#nested-group-and-multiple-peer-support-using-variant-modifiers

// 2.Data attribute variants
// - https://tailwindcss.com/blog/tailwindcss-v3-2#data-attribute-variants
export const ThinkingMessage = () => {
  const role = 'assistant';

  return (
    <motion.div
      className="w-full mx-auto max-w-3xl px-4 group/message "
      initial={{ y: 5, opacity: 0 }}
      animate={{ y: 0, opacity: 1, transition: { delay: 1 } }}
      data-role={role}
    >
      <div
        className={cx(
          `flex gap-4 w-full rounded-xl
           group-data-[role=user]/message:px-3
           group-data-[role=user]/message:w-fit
           group-data-[role=user]/message:ml-auto
           group-data-[role=user]/message:max-w-2xl
           group-data-[role=user]/message:py-2
           `,
          {
            'group-data-[role=user]/message:bg-muted': true,
          },
        )}
      >
        <div className="size-8 flex items-center rounded-full justify-center ring-1 shrink-0 ring-border">
          <SparklesIcon size={14} />
        </div>

        <div className="flex flex-col gap-2 w-full">
          <div className="flex flex-col gap-4 text-muted-foreground">
            Thinking...
          </div>
        </div>
      </div>
    </motion.div>
  );
};